土豪的微软收购了 GitHub 之后,对所有开发者开放了 GitHub 的 Action 平台,可以让咱免费使用微软的构建服务器进行构建代码。但 GitHub 的 Action 的功能可远不是只能用来构建代码,还可以有很多有趣的玩法。如本文将告诉大家的方法,在天朝里面,咱的网络是有限的。偶尔会遇到在外网上的一些有趣的资源,但受限于网络,咱下载会失败。不过 GitHub 的 Action 是部署在外网的,在微软家的网络超级超级好的服务器上的,因此咱就可以请 GitHub 的 Action 帮忙下载一些文件,接着通过其他方式,如邮件的形式发送回来
本文提供的方法依然是在 GitHub 的 Action 的正常使用范围之内,对于整个 GitHub 的 Action 而言,偶尔通过微软家的服务器辅助下载一点资源文件,几乎是无伤的
本文提供的方法也是特别简单的,仅仅只需要有前置的 Git 知识和邮箱基础知识即可,即使不知道 dotnet 也可以使用本文的方法
使用方法
为了使用上 GitHub 的 Action 就需要按照约定在代码仓库里面创建 GitHub 的 Action 构建指导文件。本方法可以用在你自己的任何一个公开的仓库上,只需要在现有的仓库里面随意创建一个 Git 分支,加入本文以下介绍的文件,推送到 GitHub 上即可。以下是详细的步骤
假定已选定一个 GitHub 的仓库,这个仓库的代码已放在本地。为了不影响现有的仓库本身,咱先使用 Git 创建一个新的分支。这个分支只用来辅助下载文件,当然,不额外创建一个分支也啥关系。通过以下命令行创建一个叫 DownloadFile 的 git 分支
git checkout -b DownloadFile
为了驱动 GitHub 的 Action 咱需要创建构建指导文件,此文件的要求是放在仓库的 .github\workflows 文件夹下,命名要求使用 .yml 结束。下面咱来创建这个构建指导文件,我创建的是 .github\workflows\DownloadFile.yml 文件
以上的 .github 文件夹需要放和 .git 文件夹同级,创建完成之后的仓库文件大概如下
│
├─ .git
│
├─ README.md
│
└─.github
    └─workflows
          └─DownloadFile.yml
接下来咱需要在 DownloadFile.yml 添加一些内容,用于进行下载文件和将下载完成的文件通过邮件发送
如果不想了解其中的细节,还请自行替换 DownloadFile.yml 以下的内容即可
name: Download File
on: [push]
jobs:
build:
runs-on: windows-latest
steps:
- name: Install download tool
run: dotnet tool install -g dotnetCampus.FileDownloader.Tool
- name: Install send mail tool
run: dotnet tool install -g dotnetCampus.SendEmailTask
- name: Download File
run: DownloadFile -u [替换为你的下载链接] -o file.zip
- name: Send file
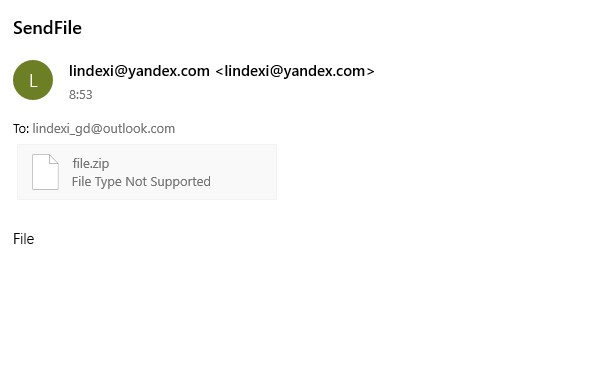
run: SendEmail -t [替换为你的邮箱账号,如 lindexi_gd@outlook.com] -s "SendFile" -b "File" --Files file.zip --SmtpServer smtp.yandex.com --SmtpServerPort 587 --UserName lindexi@yandex.com --Password miBN8dFLxdUs9d3
最小替换部分只有两个,一个是下载链接,另一个就是下载完成之后所接收的邮箱账号地址
以上的构建命令是采用我的一个临时邮箱 lindexi@yandex.com 进行发送的,如果你有特别的需求,还请自己替换发送的邮箱。替换时请先了解邮箱基础知识,如 Smtp 服务的概念。以上发送文件使用的邮箱明文写了账号和密码,如果不想泄露此邮箱的账号和密码(自己的某个公开仓库的某个小分支,一般没啥问题,而且重点是这只是一个临时邮箱而已,丢了就丢了)那么请使用 凭据管理器 将账号和密码修改为机密信息,详细请看 Creating and storing encrypted secrets - GitHub Docs
编写完成之后,将代码推送到 GitHub 上即可,此时可以从 Actions 里面找到对应的任务,等一会去自己的邮箱找找是否文件已下载完成发送到邮箱上
以下是我准备去下载我的一款 VisualStudio 插件 Encoding normalize tool 所编写的 DownloadFile.yml 文件,代码如下
name: Download File

on: [push]

jobs:
  build:

    runs-on: windows-latest

    steps:
    - name: Install download tool
      run: dotnet tool install -g dotnetCampus.FileDownloader.Tool
    - name: Install send mail tool
      run: dotnet tool install -g dotnetCampus.SendEmailTask
    - name: Download File
      run: DownloadFile -u https://lindexigd.gallerycdn.vsassets.io/extensions/lindexigd/vs-extension-18109/2.9/1582945920683/EncodingNormalizerVsx.vsix -o file.zip
    - name: Send file
      run: SendEmail -t lindexi_gd@outlook.com -s "SendFile" -b "File" --Files file.zip --SmtpServer smtp.yandex.com --SmtpServerPort 587 --UserName lindexi@yandex.com --Password miBN8dFLxdUs9d3
可以通过如下方式获取本文的源代码,先创建一个空文件夹,接着使用命令行 cd 命令进入此空文件夹,在命令行里面输入以下代码,即可获取到本文的代码
git init
git remote add origin https://gitee.com/lindexi/lindexi_gd.git
git pull origin de669aeb476e7526f2aa1db95781ba30d465d764
以上使用的是 gitee 的源,如果 gitee 不能访问,请替换为 github 的源
git remote remove origin
git remote add origin https://github.com/lindexi/lindexi_gd.git
获取代码之后,进入 .github 文件夹
原理
在开始之前,请自行了解 GitHub 的 Action 构建指导文件的语法。这部分内容请参阅 dotnet 部署 github 的 Action 进行持续集成
整个步骤可以分为三个部分,第一个部分是安装必备的工具。第二个部分是进行下载文件,第三个部分是将下载完成的文件通过邮件发送给自己
安装必备的工具,包括下载工具和发送邮件工具。这两个都是我写的 dotnet tool 工具,安装非常方便,如下面代码
    - name: Install download tool
      run: dotnet tool install -g dotnetCampus.FileDownloader.Tool

    - name: Install send mail tool
      run: dotnet tool install -g dotnetCampus.SendEmailTask
运行 dotnet tool install -g dotnetCampus.FileDownloader.Tool 安装我制作的文件下载命令行工具,运行 dotnet tool install -g dotnetCampus.SendEmailTask 安装发送邮件工具
下载文件时,采用 dotnetCampus.FileDownloader 工具进行下载,代码如下
    - name: Download File
      run: DownloadFile -u https://lindexigd.gallerycdn.vsassets.io/extensions/lindexigd/vs-extension-18109/2.9/1582945920683/EncodingNormalizerVsx.vsix -o file.zip
根据 dotnetCampus.FileDownloader 工具的使用描述,可以了解到命令行格式如下
DownloadFile -u [the download url] -o [the download file]
如上面代码下载文件路径是 file.zip 文件,在下载完成之后,执行下面代码将 file.zip 发送到自己的邮箱
    - name: Send file
      run: SendEmail -t lindexi_gd@outlook.com -s "SendFile" -b "File" --Files file.zip --SmtpServer smtp.yandex.com --SmtpServerPort 587 --UserName lindexi@yandex.com --Password miBN8dFLxdUs9d3
邮件的发送需要有发送方和接收方,其中发送方需要给服务器地址和账号密码等信息,上面代码如下部分就是给定发送方的信息
--SmtpServer smtp.yandex.com --SmtpServerPort 587 --UserName lindexi@yandex.com --Password miBN8dFLxdUs9d3
以上内容可以自己定制,使用自己的发送方邮箱。如果不想公开此发送方的邮箱账号密码,请使用 GitHub 提供的机密信息保护功能,请参阅 Creating and storing encrypted secrets - GitHub Docs
开源
以上的文件下载工具 dotnetCampus.FileDownloader 在 GitHub 上完全开源,请看 dotnet-campus/dotnetCampus.FileDownloader: The repo includes the file download library and the file download tool.
发送邮件工具属于 dotnetcampus.DotNETBuildSDK 的部分,在 GitHub 上完全开源,请看 dotnet-campus/dotnetcampus.DotNETBuildSDK: 提供dotnet打包方法
本文会经常更新,请阅读原文: https://blog.lindexi.com/post/dotnet-%E9%80%9A%E8%BF%87-GitHub-%E7%9A%84-Action-%E8%BE%85%E5%8A%A9%E4%B8%8B%E8%BD%BD%E5%9B%BD%E5%A4%96%E8%B5%84%E6%BA%90%E6%96%87%E4%BB%B6%E7%9A%84%E7%A6%BB%E7%BA%BF%E4%B8%8B%E8%BD%BD%E6%96%B9%E6%B3%95.html ,以避免陈旧错误知识的误导,同时有更好的阅读体验。
如果你想持续阅读我的最新博客,请点击 RSS 订阅,推荐使用RSS Stalker订阅博客,或者前往 CSDN 关注我的主页
 本作品采用
知识共享署名-非商业性使用-相同方式共享 4.0 国际许可协议
进行许可。欢迎转载、使用、重新发布,但务必保留文章署名林德熙(包含链接:
https://blog.lindexi.com
),不得用于商业目的,基于本文修改后的作品务必以相同的许可发布。如有任何疑问,请
与我联系
。
本作品采用
知识共享署名-非商业性使用-相同方式共享 4.0 国际许可协议
进行许可。欢迎转载、使用、重新发布,但务必保留文章署名林德熙(包含链接:
https://blog.lindexi.com
),不得用于商业目的,基于本文修改后的作品务必以相同的许可发布。如有任何疑问,请
与我联系
。
无盈利,不卖课,做纯粹的技术博客
以下是广告时间
推荐关注 Edi.Wang 的公众号

欢迎进入 Eleven 老师组建的 .NET 社区

以上广告全是友情推广,无盈利